Hosting a single page app with Nginx without 404 errors

 If you write a single-page app where the routing is handled on its own, it works perfectly on your local host with the dev server.

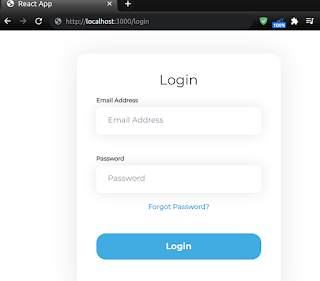
For an instance, if there is a route in your app for login such as "/login", if you try this in the localhost it will work without any issues. 

Single page app routing

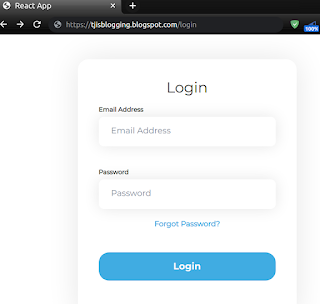
If you host this with an Nginx server as a static web app, using the direct route in the URL will end up with 404.


Nginx 404
There is an easy fix for this updating the Nginx configurations. 
Nginx default static site configuration is located in "/etc/nginx/conf.d/default.conf". This may differ based on your installation and OS. However, the configurations are pretty much the same.

You can add the following line to the configuration 

try_files $uri $uri/ /index.html?q=$uri&$args;

This makes the Nginx look for files in the file path, and if found then serve it. Or else, route the request to the index.html. 

In our example, it will look for a file called login in the static directory, since we don't have such a file it will route the request to the index.html, then handle the routing after that is up to the single page app.

This allows the single-page app to load its actual static files such as images, CSS, and js. If there are no such files, it will route the request to the index.html.


location / {
    root /usr/share/nginx/html;
    try_files $uri $uri/ /index.html?q=$uri&$args;
    index index.html index.htm; }


Edit the configuration as above and reload the Nginx configuration as below.

sudo service nginx reload

Once this is done, the single-page app's routing should work even if you type in the URL and hit enter.

nginx static single-page routing


This solution is based on the Front Controller Pattern configuration for Nginx.
Comments

  1. Thank you! Such a quick solution. I thought I'd spend a while trying to figure out the fix.

    ReplyDelete

Post a Comment

Popular posts from this blog

Install Docker on Windows 11 with WSL Ubuntu 22.04

This is to install Docker within Ubuntu WSL without using the Windows Docker application. Follow the below steps. Install Ubuntu 22.04 WSL 1. Enable Windows Subsystem for Linux and Virtual Machine platform Go to Control Panel -> Programs -> Programs and Features -> Turn Windows features on or off 2. Switch to WSL 2 Open Powershell and type in the below command. wsl --set-default-version 2 If you don't have WSL 2, download the latest WSL 2 package and install it.  3. Install Ubuntu Open Microsoft Store and search for Ubuntu. Select the version you intend to install. I'd use the latest LTS version Ubuntu 22.04. Click on the Get button. It will take a couple of minutes to download and install. 4. Open up the installed Ubuntu version that was installed. If you get an error like the below image, make sure to install the WSL2 Kernel update .  If it's an older Ubuntu version the error message would be something like the image below. Error: WSL 2 requires an update to its

Wget download pause and continue

If you are downloading a file with the wget command, sometimes you may need to pause it and start it back from the place where you paused rather than starting from the beginning. So you don't have to re-download the entire package. Wget can do this just like downloading from a web browser. Let's say I need to download a file from the web. So I'm using the wget command as follows. Download wget <url for the file> Pause To pause the download just hit ctrl + c  the shortcut to terminate the current command. Continue This is going to be the same command but -c switch to continue from the previous download. wget -c <url for the file> Simple as that! Yeah, you can download from a web browser, but this is more fun and easier 😋 If you are lazy like me, wget saves a couple of clicks.

How to fix SSLHandshakeException PKIX path building failed in Java

TL ; DR 1. Extract the public certificate of the website/API that you are trying to connect from your Java application. Steps are mentioned in this post 2. Use the Java keytool to install the extracted certificate into the "cacerts" file (Trust store) keytool -import -trustcacerts -alias <domain name> -file <public certificate>.cert -keystore /path_to_java_home/jre/lib/security/cacerts -storepass changeit 3. Restart your Java application Exception A typical exception stack trace would look like below. javax.net.ssl. SSLHandshakeException : sun.security.validator.ValidatorException: PKIX path building failed : sun.security.provider.certpath.SunCertPathBuilderException: unable to find valid certification path to requested target at sun.security.ssl.Alerts.getSSLException(Alerts.java:192) at sun.security.ssl.SSLSocketImpl.fatal(SSLSocketImpl.java:1959) at sun.security.ssl.Handshaker.fatalSE(Handshaker.java:302) at sun.security.ssl.Handshake